Tuesday, April 29, 2014

DIY Drawer Organization - I saw it on Pinterest

I saw this idea under a pin with tons of ideas for clothing organization, but this is the one that stuck out the most. My T-shirt workout clothes drawers are truly embarrassing. I can never find what I am looking for and I am in a constant battle trying to close the drawers against the bulging, over-stuffed t-shirts/shorts/etc. I tried out the idea presented at this website by Darkroom and Dearly and let me say, I feel like a whole new person! (that may or may not be an understatement). My clothes are easy to identify and laundry day won't be the bane of my existence. This was an A+ idea....so annoying it wasn't mine.


My version:


Before:
(No, I did not intentionally make my drawer look messy. It actually did look like that)

After:


I found shirts at the bottom I didn't even remember owning......


Pinterest version:


Here is my workout drawer:


It's frightening organized. Anyone who truly loves their clothes but hates digging through them to find what they want will understand me when I say: this post changed my life...... :D A big 5 stars to this Pinterest attempt.

Sunday, April 27, 2014

Crock Pot Chicken Pot Pie - I saw it on Pinterest

4-27-2014

Holy yum! I saw this crock pot dish labeled under a "skinny" pin on Pinterest, so I thought I would give it a try. I absolutely love pot pie and I am a sucker for an easy crock pot dinner. I tried it out and wowzas! Super delicious and so easy to make.


My version:


Pinterest version: No picture given


Follow this link for the absolutely fabulous and simple recipe by Skinny Mom.

Here are some pictures of the process...


5 HUGE stars to this Pinterest attempt!

Thursday, April 24, 2014

Submerged Color Hanging Mason Jar - I saw it on Pinterest

4-24-2014

I can honestly say that this creation was a culmination of Pinterest perusals and garage sale inspiration. A few weekends ago at a garage sale, I noticed a box of wood marked "free." My ears perked right up. My mom and sister thought I was certifiably crazy, but this was good, quality wood that had so many possibilities! One piece just happened to be perfect mason-jar size and inspiration struck!


My version:


Pinterest versions:


Here's how I did it...


Materials

- Piece of wood, whatever size you want
- Mason jar, whatever size you want
- spray paint black AND whatever outer color you want
- paint (I went to Home Depot and got a Sample Size of the color I wanted..I also used it for my pallet art).
- paint brush
- sand paper
- pencil
- ruler
- pipe clamp
- drill
- screw
- photo hanger
- hammer
- fake flowers


Steps


 - Step 1: Sand your wooden block to eliminate splinters. Paint it the color of your choice. Set it aside so it can dry

- Step 2: Using the steps outlined in this Pinterest post, first turn your mason jar over and spray paint it black.

- Step 3: Once the black spray paint is dry to the touch, spray it with your outer color. Spray using smooth, even, sweeping motions to avoid drips.

- Step 4: Once that layer is dry (or dry enough to flip), flip the mason jar over and spray it again, making sure to get any spots you might have missed the first time.

- Step 5: Hopefully by this time your wooden block it dry. If not, wait for it to be totally dry. Then, lightly sand it again. The more you sand it, the more rustic it will look. I tried sanding mine with steel wool, but that didn't work so great.

- Step 6: Choose which side is the front and which side is the back of your board. Using a hammer (and extra nails if necessary), attach your photo hanger to the top middle of the back of the board.

- Step 7: Measure your pipe clamp to be just a bit larger than the middle of your mason jar.

- Step 8: Using your ruler and pencil, mark on the wooden board where you want to drill the pipe clamp. Make sure to use the jar as reference so you make sure the whole jar and most of the flowers will fit on the board.

- Step 9: This is where I required some manly assistance. Using a drill, first drill a hole in the pipe clamp. Make sure you pick a spot where you will still have access to the turning wheel so you can tighten it around the mason jar. 

- Step 10: This was the trickiest step. Because the mouth of my mason jar is narrower than the rest of the jar, we could not simply drill the pipe clamp onto the board so we had to get really creative. INSTEAD, I suggest attaching the pipe cleaner around the middle of your jar. Hold the spot where you drilled into the pipe clamp against the pencil mark for where you want your jar. Drill that sucker in! Adjust it so it is straight.

- Step 11: Make sure your jar is totally dry. If so, take a small piece of sand paper and sand the words on your jar to make them stand out a little more. 

- Step 12: Place your mason jar inside the pipe clamp and turn the dial until the mason jar is firmly attached. 

- Step 13: Insert flowers of your choice and hang. Enjoy!!


I definitely give this Pinterest makeover 5 stars! I was a little worried at first but it is so funky and I just love a good mason jar with pops of color! I put a couple of pics next to it to fill the space and I just love it! It perfectly matches my new Target pillow and the pallet art I made last week. Hooray!


Garage Sale Gold!

4-24-2014

I found these golden items at a few different garage sales a couple weekends ago. Not pictured, also found: 3 pieces of FREE lumber (one of which was re-purposed to a mason jar craft).

First up: Window mirror

Ever since I moved into my itty bitty apartment I wanted a window mirror over the sink. My kitchen has no window so it is incredibly dark and boringggggg. I thought a window mirror would look great. So when I found this little baby at a garage I literally did a little happy dance. It was already that great, rustic turquoise color that goes with my red and matches a few other things in my kitchen. I was ready to pay a gross amount for this reclaimed item, so when she said $2 I was very excited! Here is my $2 window mirror that gave my kitchen the face lift it needed!


Second: Hush Puppy Moccasin Slippers

These were a totally random find. Walking through an Estate Sale, I found these little babies in a bucket full of $2 shoes. I love shoes, and I especially love fun, funky shoes, so I thought these were just great! I was a little worried 1) that I wouldn't be able to pull them off and 2) that the last person who wore them is most likely dead, but neither of those things have stopped me from rocking them already (after cleaning them, of course)! :D


Woohoo for livin' thrifty!

Monday, April 21, 2014

100 Calorie Snacks - I saw it on Pinterest


4-21-2014

I saw this great idea on Pinterest last week and thought it was brilliant so I decided to try my own version of it.

Pinterest version:


My version:


I love this idea because you can really make it your own. The original link on Pinterest suggested making one box with about 12 snacks for an entire day, but I wanted something a little different. I am frequently looking for snacks and ending up eating wayyyy more than a single serving of most things. And really, a 100 calorie snack is more than enough to quell my snacky hunger most of the time.

So, I went to Target and bought some snacks I really like. Some of the things I bought were naturally 90-100 calories, others I put into baggies to make approximately 100 calories. Now when I go to reach for a snack, I know exactly how many calories I am eating.
Materials
- ANY snack you want that can be made into 100 calorie size! Here is what I got:
- Smores granola bars (target brand)
- Raisins
- Almonds (a little less than 1/4 cup per bag)
- Honey Pretzel sticks (from Trader Joes - about 9 per bag)

I think the steps are quite apparent!


I am leaving this tub in a highly accessible place so they are the easiest for me to grab and enjoy! I think they are going to be a perfect pre-workout snack for some energy. I give this Pinterest make over a 5!


Sunday, April 20, 2014

Toffee Dip with Apples - I saw it on Pinterest


4-20-2014

As with many "pinners" I pin an excessive amount of truly delicious looking foods, and I actually make about 1% of them. In an attempt to increase this percentage, I experimented on my family this Easter with a tasty looking appetizer I found on Pinterest.

Pinterest version:


My version:


Materials

- 3/4 cup packed brown sugar
- 1/2 cup powdered sugar
- 1 8-oz. package of cream cheese
- 1 tsp vanilla extract
- 3/4 cup Heath Toffee Bits (I found these at Target)
- 5 Fuji apples (or whatever other kind of apples you want)
- 1 lemon (optional)

The 5 apples, sliced, fed about 10 people for 2 solid hours of snacking.


Steps
Step 1: Mix together the brown sugar, powdered sugar, cream cheese, and vanilla extract.

Step 2: Pour in the Heath Toffee Bits. Stir gently.

Step 3: Chill for 1 hour before serving.

Step 4: Slice apples about 5-10 minutes before serving. I squeezed a small amount of lemon juice over the top of the apples so they would not brown as quickly. I sliced two apples first, then one at a time as needed after that.


This was SUPER simple and a huge hit with my family. I give this Pinterest make over 5 stars! My picture definitely doesn't begin to do it justice! MMMmmmmm! 


Saturday, April 19, 2014

Hanging Photos - I saw it on Pinterest


This is one I did awhile back, but I thought I would add it here because I think it turned out pretty good.

Pinterest version:


My version:


Materials
- frame (any size, any shape that you want)
- white spray paint
- black ribbon
- clothespins
- hot glue gun
- twine
- black and white photos
- Picture hanger (if needed)

Steps
Step 1: If your frame isn't already empty, remove the glass, backing, and whatever else is in the frame. I found this one at a garage sale and it was already just empty.

Step 2: Spray paint the frame and clothespins white. Apply as many coats as needed.

Step 3: Cut 2 pieces of twine (or more if your frame is bigger) that reach horizontally with 1-1 1/2 inches extra.

Step 4: Using the hot glue gun, glue the twine onto the back of the frame (make sure the frame is dry). Make sure the twine is taught across the frame.

Step 5: Once the hot glue is set, place the clothespin onto the twine.

Step 6: Arrange your photos. Do not pin them in quite yet....as you can tell from mine I had to cut some of mine smaller and adjust them to ensure that they all fit. Try a few different arrangements until you find the one that works.

Step 7: Pin the pictures onto the twine.

Step 8: Cut a piece of ribbon just long enough to wrap around the top of the frame. Hot glue it on.

Step 9: Cut a longer piece of ribbon and tie it into a bow. Then hot glue it to the ribbon you just placed on the frame. (Mine has gotten a little droopy over time...)

Step 10: If needed, attach a picture hanger to the back of your frame. Most frames already have this.


Voila! I give this Pinterest makeover 5 stars! It turned out exactly how I wanted it and it is so simple to change out the pictures whenever I want!


DIY Pallet Art - I saw it on Pinterest

4-19-2014

Pinterest version:


My version:


UPDATE: Since I didn't quite get the colors I wanted the first time, I grabbed my acrylics, mixed up some gray paint, and made it how I wanted it. Here is the final product, which matches my living room much better and was my original intent:


Pinterest is full of pallet-related art and furniture ideas, so I thought I would give it a whirl. I needed something new to brighten up my living room and fill the space over my fireplace, so I saw this link on Pinterest and thought it would be perfect.

Warning: This project required the use of tools that I have no business touching, so I had help from a very handy dad for the more "constructiony" parts of this project.

Materials
- Pallet
- Saw
- Crowbar
- Hammer
- Nails
- Sand Paper
- 3 colors of paint (I went to Home Depot and got the "sample" size little cup of the three different colors I wanted
- Paint brushes (one large, one small)
- Blue Painter's tape
- Pencil
- Picture hangers x2
- Cut out of the USA (optional)


I apologize in advance for the lack of pictures....I was in the heat of the moment and forgot...need to get better at that!


Steps
Step 1: Find a pallet. Try to find one that didn't hold something too unsanitary and doesn't look like it's about to fall apart. Here is what mine looked like to start: -------------------------------->

Step 2: In order to avoid having to pull up a thousand nails, my dad and I marked with a pencil just the interior of the pallet, and then he used the saw to cut this piece out. That way, we avoided all of those support pieces in the back.

Step 3: Separate all pieces of wood and remove all nails from the pallet.

Step 4: Re-arrange the pallet to the new size you want it, with the pieces of wood touching together. Using regular nails, hammer your pieces together. For mine, I had 6 front pieces and 2 supports in back. The supports were about 3 inches wide.

Step 5: Sand the front and sides. Put some elbow grease into it! You don't want splinters later and it it much easier to paint when it is smooth.

Step 6: Draw (or trace) the shape of the United States onto your newly formed pallet.

Step 7: Using the general steps listed at this website, draw your chevron around your USA shape. I only did vertical lines and used the existing separate boards as my horizontal lines.

Step 8: Using painter's tape, tape off the lines of your chevron.

Step 9: Paint the exposed chevron stripes. I used white first. I used my larger brush for most, but used my small paint brush for up against the USA outline.

Step 10: Wait until the white is dry. I actually waited 24 hours to be safe. Once it is dry, use the painter's tape to cover the white and expose your other chevron stripe.

Step 11: Paint the other color of your chevron. 

Step 12: You do not have to wait for that to dry before you paint the USA. Using your third color and the large paintbrush, paint the interior of the USA. Using the same paintbrush, cut the edges of the shape to get the cleanest lines. 

Step 13: Put a second coat of paint over your USA (if needed)

Step 14: Let this all dry for about an hour.

Step 15: Attach the picture hangers to the support beams on the back of your pallet. Use a hammer and additional nails to make sure the hanger in not going anywhere.


Voila! Simple, no? Actually, it was surprisingly simple with the help of my very handy dad and his tools. Also, since I only used a portion of the pallet, I have more wood left for other projects... Woohoo! Here is the finished product in before/after fashion:


and


I will be posting about that fancy little mason jar soon....

All things considered I give my Pinterest make over 4 stars. I probably didn't pick the best colors and since I needed some help I can't quite give it a 5.... But I am stoked for some bright colors in my living room!

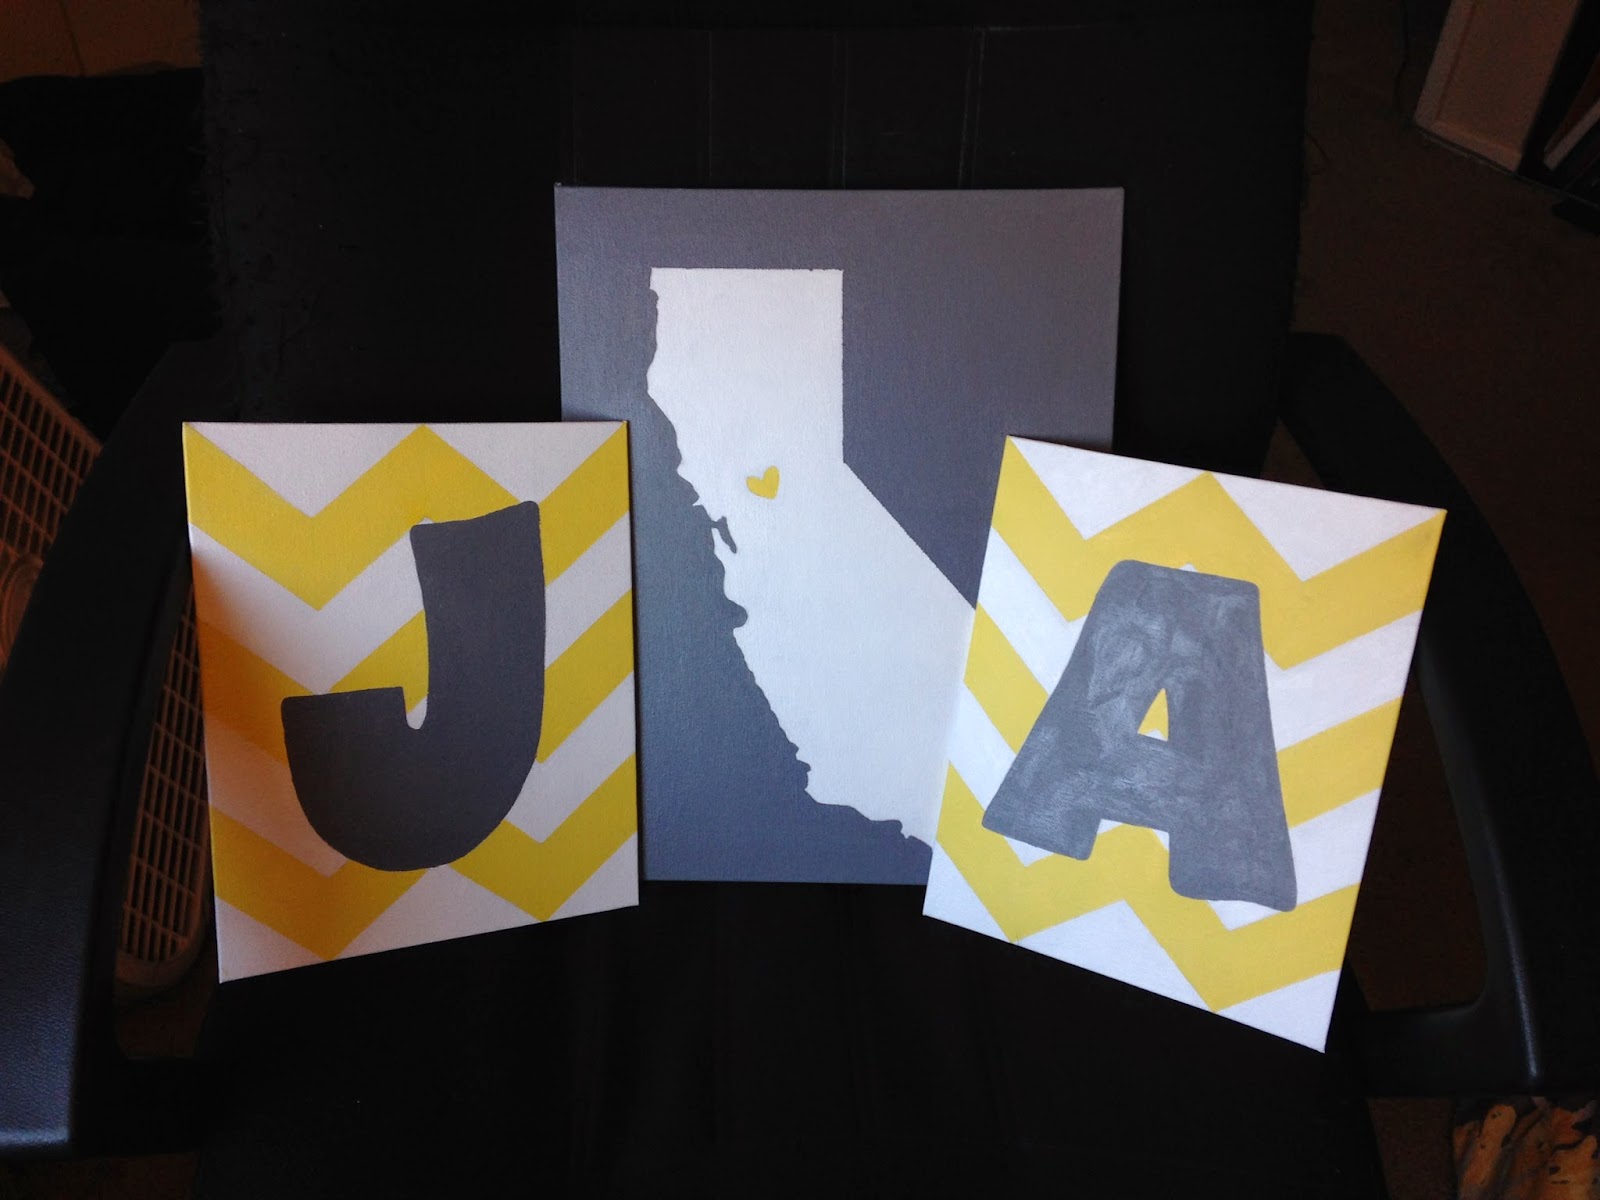
Personalized Chevron Wall Art - I saw it on Pinterest


4-18-2014

Pinterest versions: 


My version:


I've been looking for something to spruce up my bedroom wall for quite awhile when I scrolled past this little baby on Pinterest. I immediately fell in love with the letter over the chevron and decided to go for it. Before I started, I knew I also needed something else to pull it all together, so I looked through my old pins, and found this link I had pinned awhile ago. Aha! Idea complete. Now for the actually DOING...

Materials
For this project, I exclusively used things I had laying around the house...
- Canvas board (these can be bought in packs and are much cheaper than regular canvas)
- Pencil
- Printer/Paper
- Scissors
- Ruler
- Blue painter's tape
- Acrylic paint in the colors of your choice
- Paintbrushes
- Easel (optional)
- Command sticky wall sticker things :)

Steps
Step 1: Choose which size canvas boards to use (I used 8x10 for the letters and 11x14 for the CA). On your computer, print out the letters and state you want to use. (You can always hand draw these if you feel so inclined).


Step 2: Trace or draw your shapes onto the center of the canvas. I couldn't figure out how to print the CA big enough, so I drew mine by hand.


Step 3: Draw your chevron. I followed this link on how to make a chevron. Basically you draw a line down the center horizontally. Then draw a line in the middle of those lines horizontally, then do the same things vertically.

Step 4: Use the blue painter's tape to tape off the chevron lines and any straight lines on the letters or the state.


Step 5: I started with white and painted all three canvases white in the areas I wanted it. Acrylic is fast drying, so let it sit for about 1 hour before moving onto the next step.


Step 6: Make sure that the white it dry, then use the painter's tape to tape over the white and any other lines again. Paint the other color in your chevron. Now yours should look a little like this:


Step 7:  I completed the rest without using the painter's tape. Because my last color was grey, I was worried the painter's tape would still let some of that dark grey spill onto my lines, so I painted the rest by hand. I used a small, straight-edged brush to finish the edges.


Step 8: Let it all dry for about an hour. Take one of the sticky Command sticker thingies and attach it to the top middle of each picture. Then peel off the other sticky side and attach to the wall of your choosing!


Although the colors don't match AS perfectly as I wanted, I still give this pinterest makeover 5 stars! I love the personalized feel of the art and it adds some lightness to my room!