Tuesday, July 29, 2014

I love vinegar and baking soda!

We bought a wood stove last winter after our power bill was $350! I grew up with a wood stove in our house and we never turned the heater on. So, needless-to-say, I was shocked at how much electric heat costs!

After the wood stove was installed, we were basically broke. Let me also be the one to tell you that you better have a pretty penny if you want to buy a wood stove and wood stove pipe! Holy potatoes!

So, anyways, the air is really dry when you are burning wood heat and you usually need a cast iron kettle to moisten the air filled with water. I stalled as long as I could because kettles are not that cheap either. But, a couple weeks ago I found this kettle at a yard sale for $5.


I used a wire brush to rub off the crusty rust that was all over and inside of it, then rinsed with water. After that I stuck the kettle in the sink and put baking soda all over it. Then, I grabbed my husband so he could see... I poured vinegar (white and apple cider; just for shits and giggles) all over it! It fizzled and foamed and was so cool to watch! I added some hot water and let the kettle soak for about an hour. The above picture is after the soaking (I was dumb and didn't do a before picture!) It was basically orange when I bought it.

Here is the soaking after an hour. EWWW! It was completely black. The kettle is actually in the sink at that moment.

I took the kettle out of the sink and let it dry. Once it was all dry, I sprayed it with high heat spray paint. This little tube of spray paint came with the wood stove we bought for an touch ups. I just sprayed the kettle with it.

And here it is! My kettle looking very brand new! Woo hoo!! Now, I am on the hunt for a trivet to set it on. Wish me luck on my yard sale/thrift shop adventures.


Saturday, July 26, 2014

Hanging Photo Frame Part 2!

7/26/2014

My cousins recently bought a new house, and I thought this hanging photo frame would be the perfect house warming gift. I have the step by step instructions here but I thought I would add some pictures of the steps.

My version (part 2):


Note: I was originally going to attach the white "W" to the frame for their last name, but the frame is not flat so I was concerned that hot glue would not hold it on. So, ignore the "W" in the materials picture.

Materials

Set up your pictures in whatever order looks best. You are going to want to cut some of them to fit.

Measure where you want to put the string, make a mark on either side. Keep in mind that the strings will sag slightly.

For this frame, I used these hooks for the strings instead of hot glue. I was able to hand screw them in easily.

Tie the string off with a double knot!

Hang pictures on string and adjust as needed.

Tie a bow with your ribbon.

Hot glue the ribbon directly on the frame in the top middle.

Hot glue on the ribbon.

Gorgeous! Another great DIY treat! Such a simple project that is easy to replicate.

Wednesday, July 23, 2014

DIY Dresser Re-Purpose ----> Entertainment Center!

7/23/2014

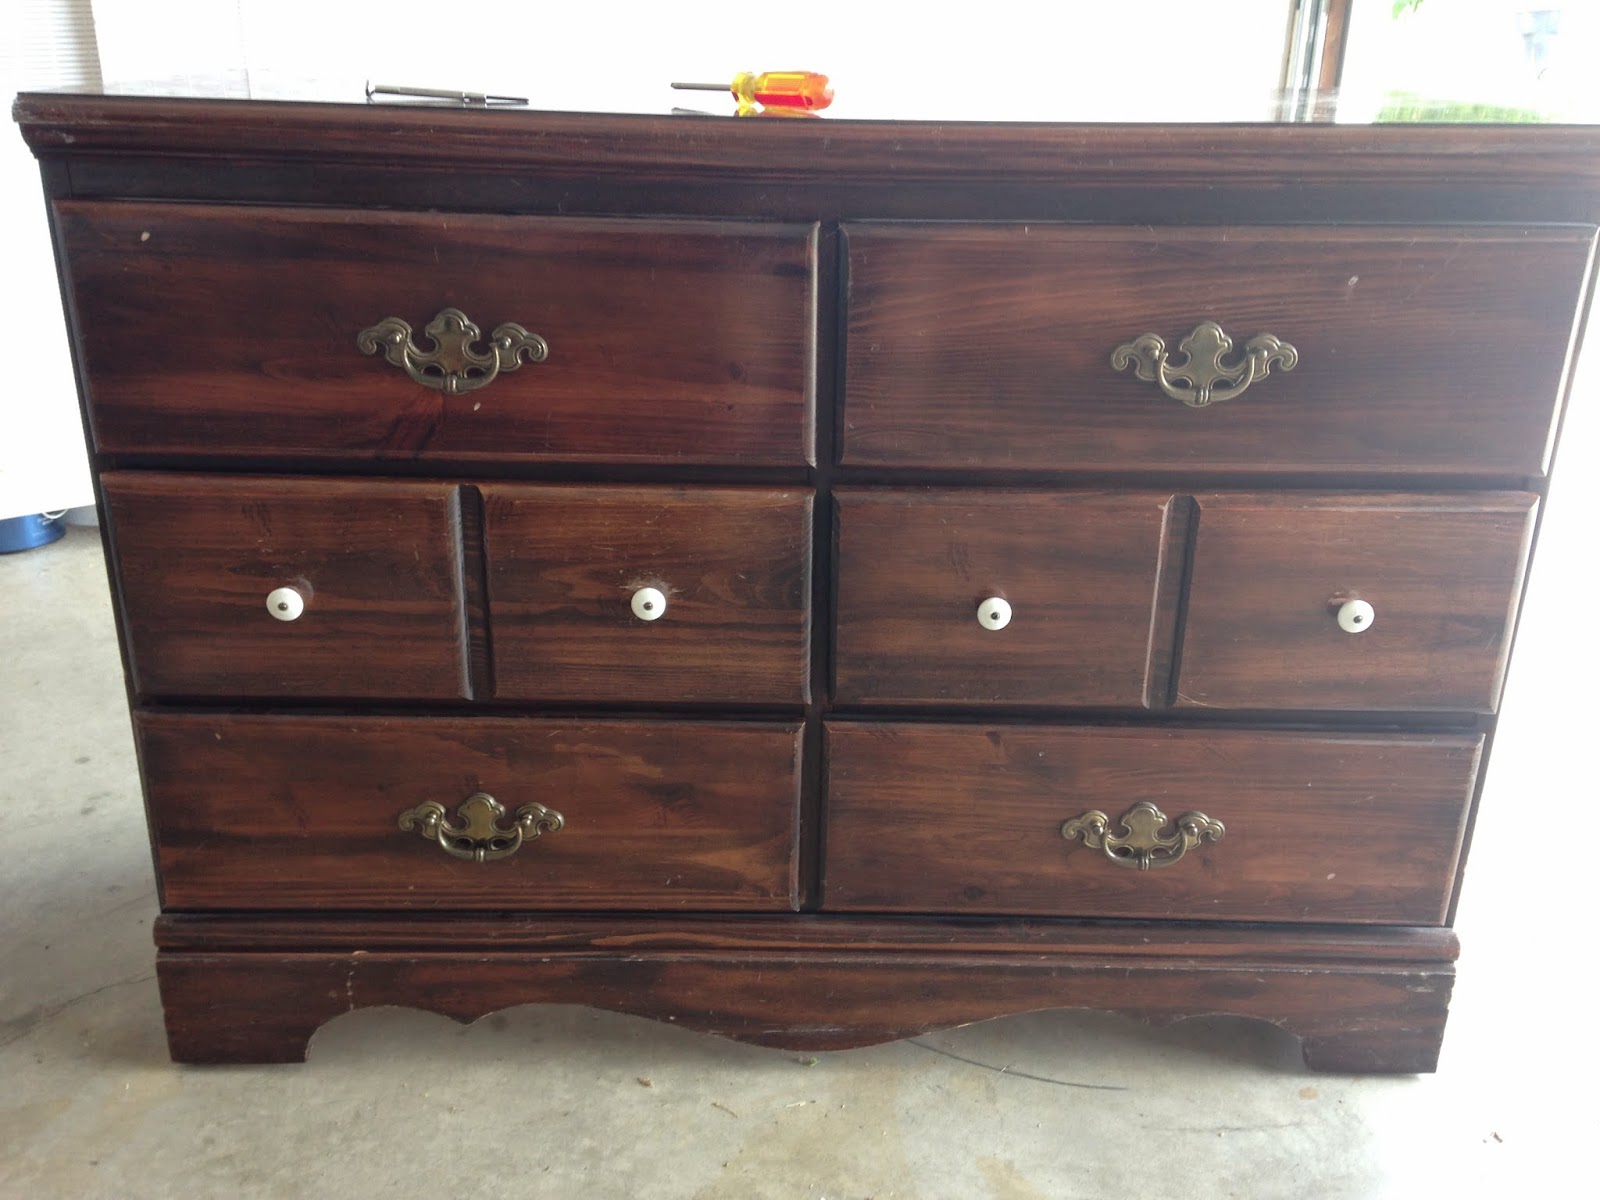
I have recently been feeling an unladylike hatred toward our entertainment center. I have never liked it but lived with it none the less. It is brown (ew, I dislike brown) and sits way too low under our mounted TV. I was complaining and online shopping when luck brought me inspiration! My mom wanted to get rid of an old dresser from her guest room that was just taking up too much space. Ah ha! No need to pay $200 for a new entertainment center when I can MAKE one! 


My version...


A closer look...


Before


After


Note: This DIY project requires either 1. handy man skills OR 2. a friend with handyman skills. Also, I am listing the materials we used and needed to make this project happen. All dressers are different, so it is possible that you may require more or less than we did.

Materials
- an old dresser that needs re-purposing
- saws-all
- ratchet
- chisel
- measuring tape
- drill
- screws
- doorknob hole drill attachment
- pallet OR plywood
- skill saw
- hammer
- crow bar
- sanding materials (course and fine)
- primer
- paint (hi-gloss) - Note, I chose to do a two-tone design because I wanted white and my boyfriend wanted black. It was a compromise, but I think it really made the inside pop! 
- painting supplies (brush, roller, drop cloth)
- new hardware for drawers

Steps
- Step 1: Remove all drawers. Decide on the two you want to keep.


- Step 2: Remove the drawer tracks using the ratchet (for the screws at the back). The tracks on this dresser were glued down, as well, so we used a chisel to get it off. Don't throw these away...you will need them!


- Step 3: Use the saws-all to cut off the front middle piece (this is going to become one big opening)


- Step 4: Remove all of the bottom board from under the drawers. Set one aside for later.


- Step 5: Measure where you want the back holes for cords. Make the holes using the doorknob hole attachment piece (or anything you have that can make a hole)


- Step 6: Take the old door tracks and attach them with the drill and screws to the underside of the front pieces, running from front to back. These pieces are going to hold up the pallet boards for you shelving.


- Step 7: Cut one if the bottom boards you set aside in half. Place one half under each drawer area. 


- Step 8: Pull the pallet apart using the hammer and crow bar.


- Step 9: Measure, then cut the pallet boards to fit inside the dresser as bottom shelves. They should be snug so they will stay in place. Also cut the boards to fit into the inner side of the big cubby.

- Step 10: Sand all of the pallet boards you plan on using with fine sand paper.


- Step 11: Lay the pallet pieces down in the dresser. Screw them into place if necessary (the top pallets in my dresser were so tight that no screwing was necessary.


- Step 12: For the inner side pieces, my dad used a chisel to "notch" the board (we used a single piece of plywood because we were out of pallet wood) so they fit right into the space. If that is not an option, find a place to screw those boards in. They should go all the way to the top so as to support the top pallet boards.


- Step 13: Sand the entire dresser using coarse sand paper


- Step 14: Remove the old hardware and sand the drawers.

- Step 15: Put one coat of primer on the dresser (I suggest using a small roller). Wait one hour, then apply a second coat.


- Step 16: Wait overnight, then apply your first coat of main paint. (I did white, tape, then black)


- Step 17: Wait overnight, then apply your second coat. ( I did black, remove tape, then white). Also, I used a small foam brush for the small nooks and crannies.


- Step 18: Attach your new drawer hardware.


Enjoy!


I give this re-purpose project 5 stars. It came out perfectly and I love it! A big thanks to my super handy Pops who made this happen!

Wednesday, July 16, 2014

DIY *No pattern* Girl's Personalized Shirt - I saw it on Pinterest

7/14/2014

This is a proud moment for me. I saw this adorable shirt on Pinterest and pinned it, originally as inspiration for a shirt I wanted to make myself. However, when I got an invitation in the mail to attend a birthday party for my friend's 2 year old, I was immediately inspired. Being that I am on summer break from teaching, I have time to craft, and who doesn't love a good DIY gift! So a few weeks and some cursing later, I brought this little gem to the party along with my glitter name sign, which I will post soon.

My version

The beautiful Lily wearing my DIY tank!

Pinterest version


A note: This DIY requires a basic understanding of sewing. I will try to be detailed in my steps, but since there is no pattern, I made some stuff up as I went! Use your judgement (or your mom, like I did) and imagination!

Materials
- Cotton t-shirt in the size of your toddler :)
- quarter fabric of a matching pattern or color
- fabric scissors
- chalk
- straight edge/ruler
- double folded bias tape of a corresponding color
- sewing materials


Steps


- Step 1: Use the chalk to mark out the shape you want your tank to be. 


Step 2: Cut off the neckline of the shirt


Step 3: Cut just the sleeves off of the tank


Step 4: Use the chalk to mark the new shape of the back. Cut the extra.


Step 5: Mark a spot about 1/2 an inch from the top shoulder seam on the backside with the chalk. You are leaving some allowance for when we re-attach the new fabric. Then, make another line about 1/2 inch above your original line across the mid back, you are leaving this allowance for when you re-attach the fabric.


Step 6: Cut across the line your just created on the top shoulder seam. Then cut straight across the line at mid-back that you drew earlier. This should completely separate that back piece.


Step 7: Lay the back piece that you just separated onto the second fabric. Use the chalk to outline the shape exactly, EXCEPT at the top should seam, where you should allot that extra 1/2 inch that you left on the shirt.


Step 8: Cut out the new shape.


Step 9: Use the chalk to mark a small half-oval along the bottom middle of the piece.


Step 10: Cut this shape out, then fold back the edges about 1/8 inch, pinning along the way. This will be our seam to avoid fraying. (It is difficult because of the oval shape, so just make it look your best!)


Step 11: Sew your seam.


Step 12: With right sides together, place the overlapping fabrics together, then fold them under and pin. For the line along the back, I pinned all the way across the straight back line so this would be one big seam. Sew them together, keeping as straight as you can. I used pink thread for this back line. For the top should seam, try to make your seam as close to the edge of the original seam as possible so the transition is smooth. 


Step 13: Pin on your bias tape, making sure that you get the original material inside the double fold. Then sew on the bias tape, using thread that matches the bias tape color.


Step 14: Grab your corresponding fabric again. Cut out the letter you want on the front of your shirt. Fold back the edges and pin. Then sew the edges.


Step 15: Place the "L" where you want it on the shirt. Pin it on. Then, using a wide zig-zag stitch, pin the letter on. (Note: I did NOT use the zig zag pattern. My mom informed me after I had already finished that I should have done so. The zig zag stitch will hold the edges of the letter down better against the shirt)


Step 16: Final touches. I noticed that the sides of the shirt were gaping, so I put a small stitch running from the armpit to about 2 inches down, angling toward the outside of the shirt. This brought in the sides perfectly. If you are making it for your own kid, then you can size it on them and adjust any fit issues.


VOILA! Finished product. Her mom said she loves it and she has already gotten compliments on it! A 5 star updo for sure!